


How to Break YourBrake System
What Is Break-In and Why Matters?
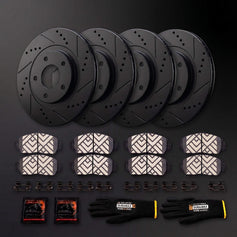
Just installed new brake pads or rotors? You’re not quite done yet. To get the best performance and avoid issues like noise, uneven wear, or poor stopping power, it’s crucial to break them in properly. This process, called bedding, helps the pads and rotors wear in together and form a smooth, even contact surface.
It’s a small step that makes a big difference, protecting your investment and making every stop smoother, quieter, and safer.

How to Break YourBrake System
BREAK IT IN RIGHT
Skipping the brake break-in process can leave brakes feeling weak or inconsistent and risks damaging new parts before they've properly seated. This can lead to uneven pad and rotor wear, vibration or noise, and reduced stopping performance under load or heat.
Doing the break-in properly, by contrast, gives you stronger and more consistent braking, quieter operation, and longer-lasting pads and rotors. A little time upfront prevents bigger problems down the road.

How to Break YourBrake System
BEFORE YOU START: QUICK TIPS
A successful break-in begins with proper preparation. Before starting the process, double-check that your brake parts are securely installed. Find a safe, open area with little traffic, and avoid sudden stops until the process is complete. The full process takes about 30–40 minutes.
It’s normal to notice light smoke or odor during break-in, but if you hear grinding or feel pulling, pause and inspect. A quick check now can prevent issues and help your brakes perform their best from day one.
STEP-BY-STEP BREAK-IN PROCESS
Follow this break-in process to properly bed new brake pads and rotors, helping improve stopping performance, reduce noise, and extend brake life.
STEP 1
Find a Safe Area
Choose a safe, open space where you can accelerate and brake repeatedly without traffic, pedestrians, or interruptions.
STEP 2
Initial Aggressive Stops
Accelerate to 35 mph (55 km/h), then brake firmly down to 5 mph (8 km/h). Do not come to a full stop or allow the brakes to cool between runs. Repeat 6 times.
STEP 3
Moderate Stops
Repeat the same process using moderate braking pressure instead of aggressive stops. Again, avoid full stops or cooling periods. Complete 6 repetitions.
STEP 4
Cool Down Drive
Drive at a steady speed for 6–8 minutes without heavy braking or full stops. For Performance or Comfort Series rotors, extend this drive by an additional 3 minutes.
STEP 5
Final Cool Down
Park the vehicle and let the brakes cool naturally for at least 30 minutes. Avoid pressing the brake pedal during this time.
STEP 6
Completion
Your break-in process is now complete. You should notice smoother stops, reduced noise, and a more consistent brake feel moving forward.
STEP 1
Find a Safe Area
Choose a safe, open space where you can accelerate and brake repeatedly without traffic, pedestrians, or interruptions.
STEP 2
Initial Aggressive Stops
Accelerate to 35 mph (55 km/h), then brake firmly down to 5 mph (8 km/h). Do not come to a full stop or allow the brakes to cool between runs. Repeat 6 times.
STEP 3
Moderate Stops
Repeat the same process using moderate braking pressure instead of aggressive stops. Again, avoid full stops or cooling periods. Complete 6 repetitions.
STEP 4
Cool Down Drive
Drive at a steady speed for 6–8 minutes without heavy braking or full stops. For Performance or Comfort Series rotors, extend this drive by an additional 3 minutes.
STEP 5
Final Cool Down
Park the vehicle and let the brakes cool naturally for at least 30 minutes. Avoid pressing the brake pedal during this time.
STEP 6
Completion
Your break-in process is now complete. You should notice smoother stops, reduced noise, and a more consistent brake feel moving forward.